Launched

Bayline launched Catalpa today. New engine. New electrical. New Hoses. Lots of new things.

Engine ran well. I need to adjust the stuffing box as it ran a bit hot.

The engine installation was a huge job. Unfortunately I did not document the process as I went through it. I was very focused on “getting it done”. Several months later… It’s Done! (I hope). I’ll get some pictures up soon.

Catalpa Christmas

12-20-13_010

I’ve got some of the foundation work done for the new engine beds. I’m using part of whats there and adding on to them. I’ve also started work on the icebox. I’m adding 2″ more of solid foam insulation and an inner liner. As is now we can only get a couple of days out of our ice. It’s funny, thinking about ice at this time of year.

Our new engine came in. I like it! It’s a Beta 14. 14HP, English, Ferrari red, need I say more? I’m not usually overly impressed with gadgets, but I’m very excited about this new engine.12-20-13_007 12-20-13_008

Engine Jig

I built a jig to represent the new engine. I bolted the jig to the old prop shaft and aperture which I temporarily put back in the boat. The big carriage bolts represent the engine mounts. The squares on the bottom represent the oil sump. I have plenty of room above it so I didn’t bother mocking up any of the top end. It’s tight down low. Some of the old engine bed has to be cut away. The rest I will use as a foundation for the new beds as it is well built. It seems like half the work is just the planning and knowing what to do next. Frost on the windshield this morning.

10-24-13_00110-24-13_004

Discovery Phase

Since removing the engine I’ve been doing a lot of cleaning. The days are getting shorter and colder so I figured this part of the project should be completed while the temperature is still in the 60s.

I spent a few days trying (unsuccessfully) to remove the propeller. After breaking my gear puller, I cut it off with a sawzall.  10-22-13_001

I never really completely understood how my stern tube was set up. I have repacked the stuffing box but the rest of it was covered in resin and grease. What a mess! The “tube” consists of a bronze aperture on the stern (with cutless bearing). That has a hose attached to it with the stuffing box clamped to the hose. The problem is they just glassed the hose into the boat. AAaaaahhhhhH !!!! This is completely wrong. The hose was in bad shape from having oil and fuel soak into it for 20+ years. This is a good way to sink a boat. I cut it all out.10-22-13_002 10-22-13_003 10-22-13_004

The cleaning is done. So are the leaves on the trees.10-22-13_006

The Engine

As I alluded to in my earlier post, I’ve been having some issues with our 27 year old Universal engine. Every year I spend a considerable amount of time and boat dollars trying to get it to run properly. I’ve learned a lot about diesel engines in the process. Last year, while replacing the exhaust, I broke the manifold. Unfortunately the manufacturer no longer carries the part. This got me thinking about what other parts will I not be able to obtain in the future?10-3-13_001

We had the broken manifold brazed by a welder in New Bedford. Then re-machined so the exhaust would fit back on. Unfortunately, it was also cracked internally and had antifreeze leaking into the exhaust portion of it. This I repaired with JB Weld and some other exhust goop. It held for the summer but I’ve been told by several mechanics that eventually I’ll have a problem again. We plan on taking Catalpa down the ICW someday so we made the decision to repower. The decision was not made lightly as a new engine is very expensive and our Universal starts every time I turn the key.

We went to the Newport boat show and bought a Beta 14 engine. They are made in England and are manufactured from a Kabota block.

From October 1-3 I spent my time disconecting the old engine and getting it prepared to be pulled out through the hatch with a crane.10-3-13_007

I used the main sheet block and tackle along with the boom vang to haul it out of its hole.

I constructed a wood platform to put the engine on in the cabin saloon.

10-3-13_01810-3-13_012

A very helpful tool in this process was a basketball. The weight of the engine obviously made it very difficult to move. I deflated the basketball, put it under the engine, and re inflated it. This lifted the engine up enough (off of the beds) to pull it forward.10-3-13_022

It worked great. I was surprised by how smoothly the whole process went. Nothing damaged and only a few bruises.10-3-13_021 10-3-13_023

Setback

The goal was to leave by August 1st (today), but a few unexpected things happened.

1- After launching Catalpa I decided to take the dingy out to locate our mooring as we were moved to some deeper water last winter. I brought our little Honda outboard out of winter storage but wasn’t able to get it started. I spent a day or so fooling around with it but still wasn’t able to get it going. I brought it to a mechanic. They have to rebuild the carburetor and I should get it back by Friday.

2- After resolving the outboard dilemma I opened Catalpa’s engine hatch, for some reason, only to find oil pooling under the engine.  Big problem. I think its leaking from the dipstick tube which is very rusted. Apparently it must have cracked when we took our first run through the harbor to get to the mooring. I’m not much of a diesel mechanic but it looks like it’s only 2 bolts holding the thing on the engine so I figure I might be capable of replacing it. Unfortunately, our local distributor says it’s going to take two weeks to get the part from the factory. I spent half the day trying to locate the part elsewhere in the US and have it express shipped to us. I’m currently waiting on this.

IF I get the part, AND I can install it, AND I get the outboard back then I’m hoping to leave Saturday or Sunday. As I mentioned before – big problem.

Almost Done

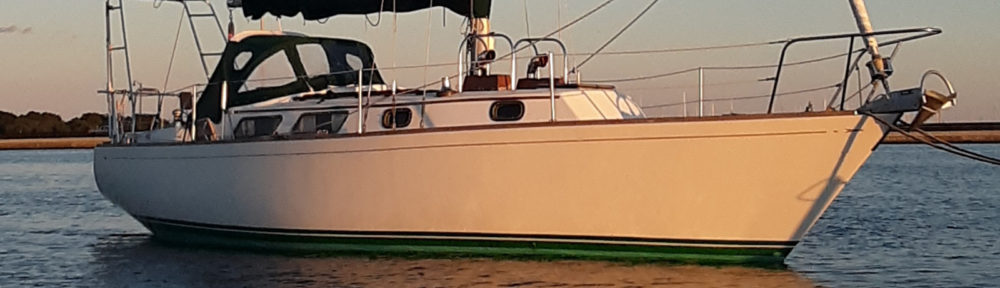
After a lot of work there is light at the end of the tunnel. I have scheduled Catalpa’s launch for next Wednesday, July 25. We’ve been working diligently to complete as much as we can before splash day. Frequently temperatures in the shed are well over 100 degrees so I’m generally up at 5:00am working. I put a thermometer up on deck and it reached 109 a few days ago. HOT!

After the primer was completed I again sanded the boat and applied 4 coats of System 3 LPU paint. The paint job is not perfect. There are some brush marks and bugs but in general, I’m happy with it.

The paint seems very hard and durable so I feel it will last a long time. This paint was applied to all of the areas that don’t get non-skid paint (SKID?). So the skid is a shiny white.

After this was completed I re-taped for non-skid. For this I used a product called Kiwi-Grip.

This is a water based product that goes on very thick with a notched trowel and is then rolled out with a special roller. I’m pretty impressed with how it came out. The only problem I’ve had is that it seemed to have taken a long time to completely dry. Therefore, some of it got a little dinged up in the work that followed. If it needs it, I’ll roll on another coat next winter. I like the texture and color. I hope it holds up well.

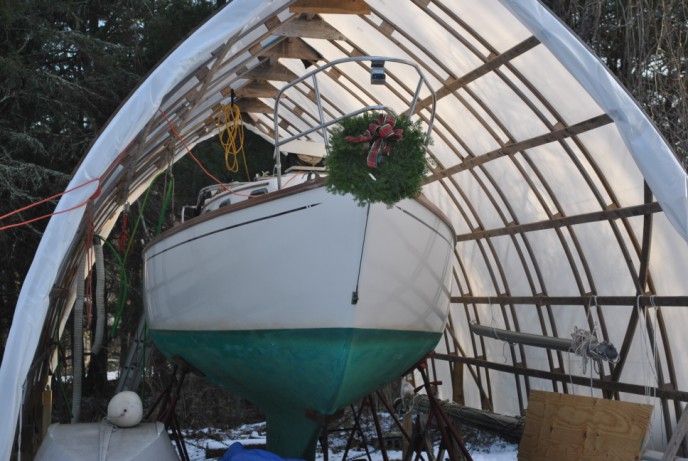
My poor shed is going to pieces. I’ve cut many holes in it to try to vent out some of the heat. The other day I ripped

the whole front wall off. It’s done its job and held up really well through windy days and winter squalls. I’ve enjoyed having a huge hangar to work on my boat in but it will be nice to get the yard back.


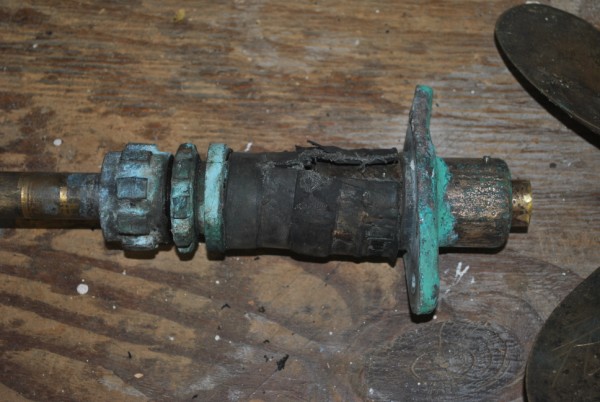
We’ve re-bedded most of the hardware that was removed from the deck. Now I’m just checking a bunch of small stuff off of the list. The one additional large job that I decided to add was stripping and redoing the teak. I’ve got 2 coats of “Cetol Marine” down and one or two more before launch day. Normally, I use Epifanes Varnish but I decided to try something new. In the past Cetol always

looked a bit too orange to me but this is their natural teak formulation. It’s more of a light brown tint.

I can’t wait to get out on the water.

Primer

Things are starting to look a little better. Over the past few days I did a ton of sanding and fairing. My longboard is now welded to my arm and my finger tips are sanded off. I could have done some more filling and fairing but I decided to call it “DONE”.

For primer, I decided to use “Interlux Interprotect 2000E with micro plates”. Try to say that 10 times fast. It’s not really a traditional top sides primer. It’s normally used under the waterline as a barriercoat to prevent osmotic blistering. I liked the big name and the fact that it is billed as a barrier coat. It’s a 2 part epoxy with some heavy duty solvents. I’ve had to where a respirator while working with it.

It took quite a while to get all of the dust off of Catalpa. I bought a new HEPA filter for my shop-vac and wiped her down with alcohol several times. I rolled the decks and painted the cabin house with a good brush. The first coat covered all of the cracks in the deck. I intend to get at least three coats over all of the critical areas.

The taping took more time than the actual painting. My co-captain took over the taping duties so I could get away from it for a little while.

The primer is going down fairly smooth. I’ve had to add extra solvents to it due to the heat. Once this is done, it’s back to sanding again. Then onto gloss paint.

Fairing the deck

Over the past few days I’ve had some opportunity to do a bit of thinking. What percentage of my life has been spent sanding something? I bet that it is a pretty big number. I sand everything. Every single thing I have ever created has been sanded. You’d think I enjoy sanding. I don’t. Over the winter I started brewing beer as a hobby. Beer doesn’t get sanded and it helps relieve some of the pain created by sanding all day.

The deck work is progressing. I’ve patched the large areas with new balsa and three layers of fiberglass. All of the various drying holes have been plugged too. The deck has a lot of uneven areas due to repair work and grinding the original non-skid gelcoat off.

In the first couple of pictures you can see the most recent application of epoxy based fairing compound.

This stuff goes on the deck and then you basically sand most of it off so it fills in the low spots. I use a big 6″ random orbit sander and a long-board. I made the long-board by gluing a  40grit belt (belt sander) to a piece of plywood. It works well and also promotes a good upper body workout.

The last 2 photos are post-sanding. I still have one or two more coats of fairing and then the first coat of epoxy primer.

Big Fiberglass Mess

Work has progressed slowly since my last update. The New England winter was pretty mild this year. I probably would have been able to complete most of my project but it has been a busy winter. As often happens, the boat work was delayed.

The main reason for enclosing Catalpa was to explore and repair the extensive deck damage. The deck consists of a top and bottom layer of fiberglass that encapsulates a balsa wood core. The gel-coat that covers the deck is very thick but unfortunately the top layer of fiberglass is very thin. This top layer has got many stress cracks in it. This allows water to penetrate into the balsa core which creates all sorts of problems. With the help of a moisture meter, and by drilling core samples, I was able to find the extent of the problems.

Back in November I started cutting into the deck. Where I found rotten balsa, I completely removed the top skin and the balsa core. In areas where I found high moisture, but the balsa was intact, I decided to drill the deck with many holes to allow the moisture to escape the core material. Essentially the deck has been drying out for the last six months or so. It worked well. I checked everything again with the moisture meter and it is dry.

Next step in the process is to grind all of the gel-coat nonskid off of the deck I can’t match the many numerous repairs with the old nonskid so I plan on replacing it with a product called Kiwigrip. More on that later.

Anyway the deck grinding continues on. The shed is acting like a greenhouse now so the temps are probably close to 90 degrees around mid day. Add to that a hooded tyvek suit, dust mask, and ear muffs, you get a very disgruntled boat worker. Most of the destructive work is done. I’ll soon be moving on to fixing things. My goal is to launch by mid July.